Stamped Paper Roses
I have been using TinaR's tutorial to create my own paper roses: http://tina-mypaperpantry.blogspot.com/2010/05/distressed-rose-tutorial.html. But this is my own spin on creating the same paper rose... Tina, thanks for the inspiration, your LOs are awesomeness!
A few pointers here before I start. The key to making a beautiful looking rose is to have hearts of at least 3 sizes. Depending on the paper you use and the style you use to scrap, then the finishes will vary. You will need a brad to hold the rose together, and in this particular case, the longer the prongs, the better it will hold all the layers and still have enough length left to fold over.
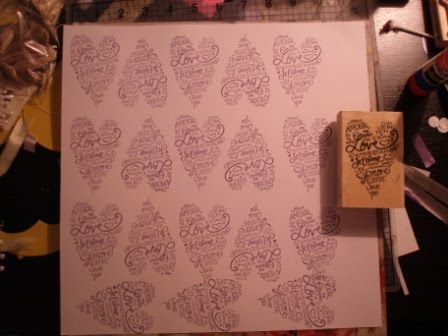
In this specific case, I fell in love with a stamp with the word love in many different languages and shaped like a heart. So I wanted to use that stamp on my paper to create a whimsical looking rose. I used Tim Holtz Distress Ink in Dusty Concord for a purpl-ish color.


Using the ink tool from Ranger, I blended the edges of the hearts so that you could see a defined shape.


A few pointers here before I start. The key to making a beautiful looking rose is to have hearts of at least 3 sizes. Depending on the paper you use and the style you use to scrap, then the finishes will vary. You will need a brad to hold the rose together, and in this particular case, the longer the prongs, the better it will hold all the layers and still have enough length left to fold over.
In this specific case, I fell in love with a stamp with the word love in many different languages and shaped like a heart. So I wanted to use that stamp on my paper to create a whimsical looking rose. I used Tim Holtz Distress Ink in Dusty Concord for a purpl-ish color.

Using the ink tool from Ranger, I blended the edges of the hearts so that you could see a defined shape.


Next, I cut out the hearts, I didn't really worry about making the cutting perfect, as they are more of a distressed shape than a perfect one. I counted 18 hearts and lined them up in rows of 6. Because I only had one size stamp, all my hearts started out being the same size, but that's easily fixed by cutting them to smaller sizes. Again, no worries here about making it perfect. And as I had said before, you need at least 3 sizes.

Next you cut straight into the middle of the heart so that later on you can fold the curves of the heart as petals.

And now you put it all together in a brad! Start out with the small hearts and then the biggest ones go last.

This is what you end up with:

Now comes the shaping. My own personal way to get this looking like a rose is to use an embossing stylus to roll up each individual petal. If you don't have a stylus you can use a pencil or a pen. I like the stylus because I use the thin part to roll up the edges and then the thicker handle to roll up the base of the petals.


Another little trick that is helpful to get the rose to take shape is to push the base of the petal towards the center while you have it rolled up. This way you are creating an instant push upwards so the flower can take shape.


Now we just have to worry about the center. Cut out two tiny hearts and fold them together like I show in the picture:

Apply your preferred glue to the center of the rose and then wrap the tiny folded hearts to insert them in the middle. I like to scrunch the flower so that it folds on itself and looks more like a rose. Especially in the middle, so that the folds close in on the brad and you can't see it ;-)

I then applied some glimmer mist and voila! Your paper rose is ready...


Thanks for looking, and check out Tina's blog if you want to try out the version that inspired me!

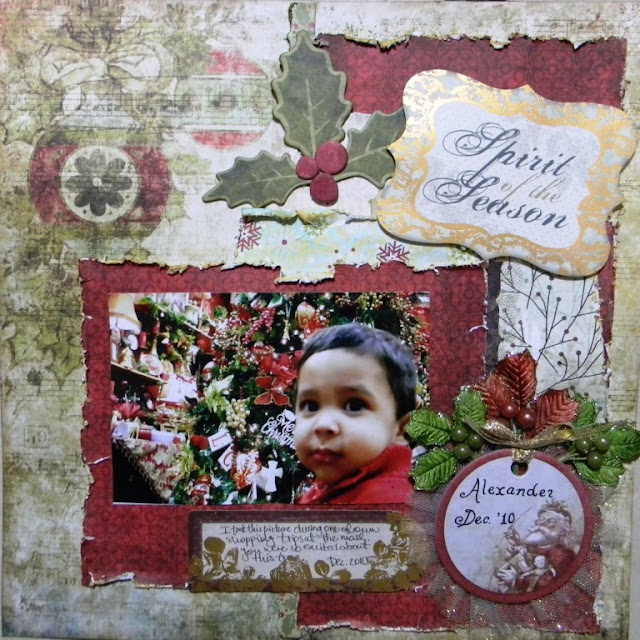
And here is the stamped paper rose used in one of my favorite LOs!


That rose is gorgeous! Thanks for the tut! I am definitely going to try this!
ReplyDelete