Posts

Cards for OWH ~ Part 2
Image
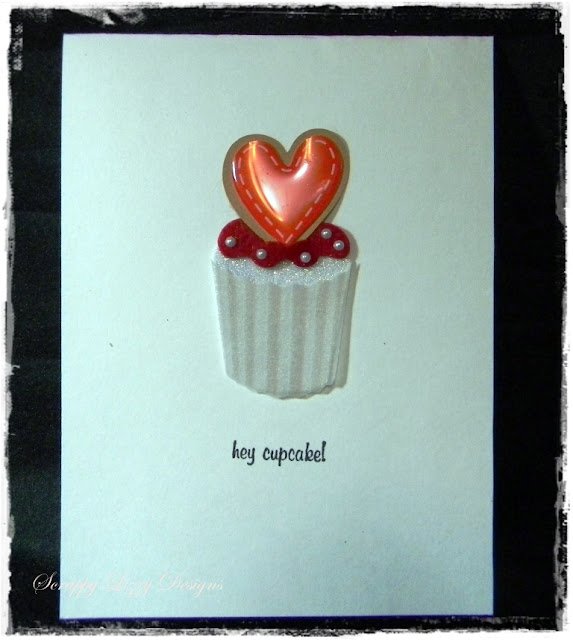
  Hi everyone! I've been working hard trying to get all my cards for OWH packaged and ready to ship, so I'm just now posting the rest of them.  For some reason when it comes to cards I love minimalistic touches.  I may go all out sometimes, especially with layouts, but with these cards I found out that sometimes less is more.  I really hope they are enjoyed by both the service men and women and their loved ones.   First one is pretty simple.  I used a 3D cupcake sticker by Jolee's and stamped with the "hey cupcake" birthday stamp from a set that I have had for a very long time and have no idea what brand it is...   This one is probably my all-time favorite.  I had this piece of chipboard sitting on my stash for ever! It just didn't go with anything.  It's by colorbok.  So I reached into my stash determined to use all kinds of goodies in these cards and thought of adding a rose to the pretty green mirror.  The stamp is by Ali...

Cards for OWH

Image
I've been making these cards to donate to Operation Write Home (I have them on my list of blogs I follow:-).   Here are the cards I made and the products I used.    This card is made with bazzil basics cardstock in tutu pink, slate gray, and french vanilla.  I used the Martha Stewart deep edge punch to create the edges.  I used a Nestabilities scalloped die to cut the mat for the sentiment.  The stamp is from Hobby Lobby.  I crinkled seam binding and tied three miniature roses to it.   This card is very simple, the key embellishment are the buttons, which are from Hobby Lobby.  I used a Martha Stewart punch to create the peach strip and used bazzill basics baby blue cardstock as a background.   This card is made with the same Martha Stewart punch I used in the first card, but this time I used some lace to adorn the edges.  The flower is handmade and I have a tutorial here on my blog, check out my list of tutoria...

In Loving Memory

Image
Dear bloggers, my family is in mourning.  My dear sister passed yesterday morning.  Her body could not take the prescribed treatment and she is now in peace and free of pain.   She was the most loving person I know, and also the most amazingly kindhearted sister.  I will take a break from blogging to be with my family.  I thank you for visiting my blog. God bless. In Memoriam With you a part of me hath passed away; For in the peopled forest of my mind A tree made leafless by this wintry wind Shall never don again its green array. Chapel and fireside, country road and bay, Have something of their friendliness resigned; Another, if I would, I could not find, And I am grown much older in a day. But yet I treasure in my memory Your gift of charity, and young heart's ease, And the dear honour of your amity; For these once mine, my life is rich with these. And I scarce know which part may greater be,-- What I keep of you, or you rob from me. G...

My sister

Image
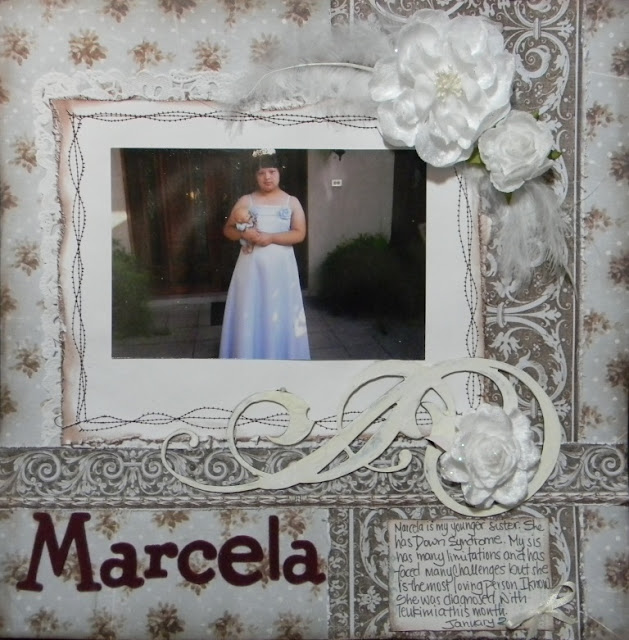
This post is dedicated to my sister, Marcela, who is fighting the fight of her life.  Marcela was born with Down's Syndrome and has overcome many of the developmental challenges that come with it.  But at only 15 years old, my sister has been diagnosed with leukemia.  I was intensely devastated by the news, her being so far away and me not being able to be there with her through this fight.  {Este post esta dedicado a mi hermana, Marcela, quien esta enfrentando la batalla mas dura de su corta vida.  Marcela nacio con Sindrome de Down y a traves de los años ha vencido muchos obstaculos relacionados con este diagnostico.  Pero con tan solo 15 años, Marcela ha sido diagnosticada con leucemia.  Estas noticias fueron devastadoras, ya que yo estoy tan lejos y no puedo estar con ella fisicamente en la batalla que viene.}   It has been a very emotional time for me and I am usually a very private and strong person.  But this news really touched m...

Get creative: Using handmade roses in cards and layouts

Image
As I had mentioned on my previous post, I have added new items to my etsy and will continue adding this weekend.  First I want to get the spotlight on the handmade roses I have listed here:  My Etsy I have created a layout and two cards featuring some of my items listed right now.  The first I want to share is called "Smooch" and it is a Valentine style layout.  The picture turned out so cute... My son is kissing his cousin Jocelyn, but he's acting a little shy.  I'm so glad I had my camera handy to capture that moment.  I used papers from Bo Bunny Crush and My Mind's Eye Lost & Found.   I used one of the linked heart dies I have listed here:  My Etsy    I cut them from white cardstock so they are easily transformed to match your layout or card color palette.  The one I used in this layout I embossed with two layers of Pearl UTEE and one layer of MS embossing powder in ladybug red.  I love the glossy finish and th...

I was featured on the Teresa Collins Blog!!!!

Image
This weekend has been hectic, with planning my return to school and starting a new semester.  Found out I'm teaching a course and though I love teaching undergraduate courses, my load this semester is seriously looking to be overwhelming.  So here I am finishing up my fellowship application and I checked my blog and see all these comments on one of my posts...  Well, turns out Teresa Collins featured my two-page layout of Coundown 'til Christmas on her blog!!! I just about fell off my chair!!! I love her products, they are so elegantly abstract and ornate at the same time.  I actually keep a stack of her album kits and papers well stocked on my scraproom (seriously, I keep like 2-3 sheets of each and every one of her lines... LOL). Thanks so much for making my day Teresa!!!!  I'm so honored!!! (and  sooooo surprised!) Here's a link to the post on her blog:  Teresa Collins Blog . This is the 2-page layout that was featured on her post: TFL...

Distressed Rose Tutorial

Image
I recently used these roses on a layout and thought I would share a tutorial with all of you.  They're actually super easy to make!   You'll need some flower punch outs or die cuts in two sizes.  I used the tattered floral die from Alterations by Tim Holtz.  I like the distressed look but they will look just as great without any distressing.   1.  The first thing is to get three big flowers and two small ones.  You can see I used the bigger and medium flowers from the TH die.  2. Now that you have your distressed flowers, let's move to the next step.  Use a mister to spray some water over the flowers.  Just a tiny spray will go a long way, you don't want the layers to tear while you're assembling the rose.   3.  Now take one flower and fold the petals towards the bottom, as I show in the picture.  I use my fingers, but you can use a pencil or an embossing stylus. 4.  Your flower should look like t...